Introduction
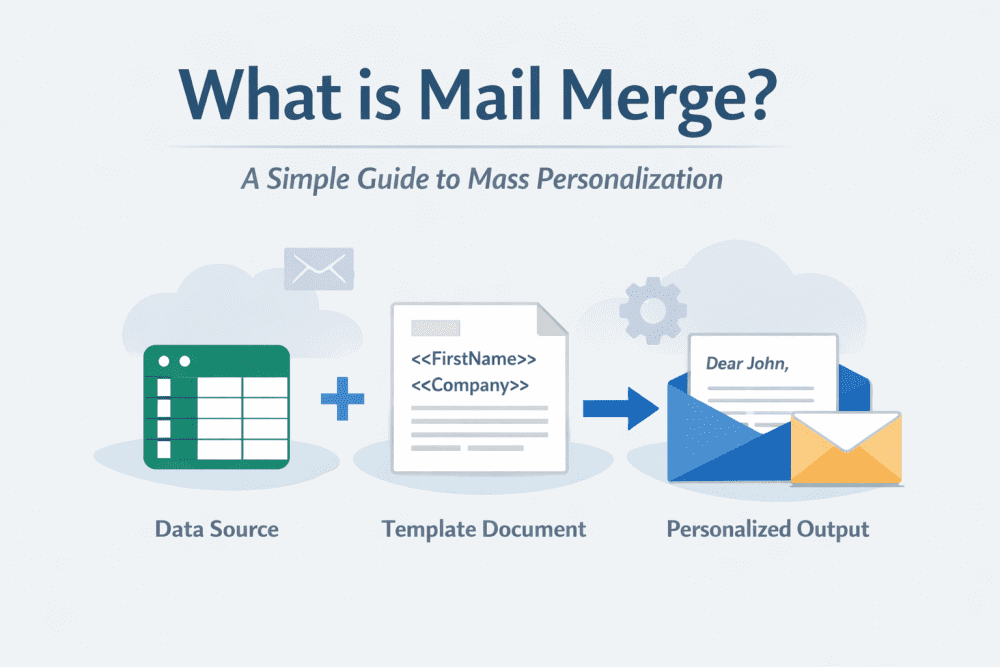
Mail merge is a feature that allows you to create multiple personalized documents—such as letters, emails, labels, or invoices—by combining a single template with a structured data source like an Excel sheet.
In simple terms: Template + Data + Automation = Personalized Bulk Communication.
It helps you send large volumes of customized messages without manually editing each one.
Related blogs:
How It Works (The 3 Core Components)
1️⃣ The Data Source

The data source is a structured file containing recipient information. Common formats include:
- Microsoft Excel (.xlsx)
- CSV files (.csv)
- Google Sheets
- Outlook contacts
Each column represents a field such as:
- First Name
- Last Name
- Email Address
- Company
- Address
Each row represents one recipient.
2️⃣ The Main Document (Template)
The main document is your template. It contains:
- Fixed text (common to all recipients)
- Merge fields (placeholders like
<<FirstName>>)
Example:
Dear <>,
We are excited to offer you an exclusive discount at <>.
These placeholders automatically pull data from your spreadsheet.
3️⃣ The Merged Output

After running the process, the system generates:
- Personalized letters
- Bulk emails
- Address labels
- Certificates
- Invoices
Each document appears individually written—but the entire workflow is automated.
Step-by-Step: Perform the Process in Word (2026)
From Excel to Word
- Open Microsoft Word
- Go to Mailings → Start Mail Merge
- Select document type (Letters, Emails, Labels)
- Click Select Recipients → Use Existing List
- Choose your Excel file
- Insert merge fields (First Name, Email, etc.)
- Click Preview Results
- Select Finish & Merge
This connects Word with Microsoft Excel to generate personalized documents automatically.
How to Do It in Google Workspace
In Google Docs and Google Sheets, this functionality requires an add-on.
Basic workflow:
- Create a Google Sheet with contact data
- Write your template in Docs
- Install a suitable add-on
- Map fields (First Name → Column A)
- Send personalized emails via Gmail
This approach is commonly used for sending customized bulk emails directly from Gmail.
Common Use Cases and Examples
This technique is widely used for:
- Business proposals
- Wedding invitations
- Event certificates
- Bulk personalized emails
- Invoice generation
- Automatic label printing from Excel
Example use case:
Instead of manually editing 500 invitation letters, you can generate 500 personalized copies in minutes using a structured dataset and a single template.
Comparison: Document-Based Automation vs Email Marketing Software
This built-in office feature is ideal for:
- Small-scale personalization
- Internal communications
- One-time campaigns
However, tools like Mailchimp or HubSpot offer:
- Advanced automation workflows
- A/B testing
- Analytics tracking
- Conditional segmentation
The traditional approach focuses on document generation.
Email marketing platforms focus on behavioral automation and campaign analytics.
Advanced Features (2026)
Experienced users often explore:
- IF/THEN conditional formatting
- Adding attachments automatically
- Sending emails without Outlook
- Exporting merged files as PDF
- Gmail integration through extensions
These capabilities bridge traditional office productivity with workflow automation.
FAQ
What are the three parts involved?
- Data Source
- Main Document
- Final Output
Does this process work with PDF?
Yes. You can generate the documents and export the final version as a PDF.
How can I send personalized emails?
Use Word with Outlook integration or a Google Workspace add-on connected to Gmail.
Final Thoughts
This feature remains one of the most powerful yet underused productivity tools. While modern marketing platforms dominate automation discussions, it still offers a fast, cost-effective solution for bulk personalization.
If you understand template structure + structured data, you can automate hundreds—or even thousands—of customized documents in minutes.
That is the real advantage of this workflow.